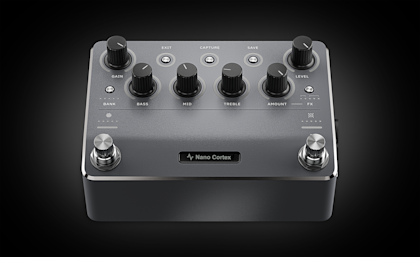
Knowledge base > Getting started
Connecting your gear to Nano Cortex
In this guide, we’ll cover the input and output (I/O) options available on Nano Cortex, providing an overview of how you can integrate your device into different setups.
Overview
Nano Cortex seamlessly integrates into any setup, whether you’re connecting directly to studio monitors, an FRFR cab, an amplifier, adding it to a pedalboard, or incorporating it into a complex studio rig.
Additionally, Nano Cortex doubles as a fully-fledged audio interface. For more information, read our guide on using Nano Cortex as an audio interface.
The following sections will guide you through common connection scenarios.
I/O overview

8 - 1/4" instrument input (INPUT): Connect your guitar or bass using a standard 1/4" instrument cable.
9 - 1/4" TRS outputs (OUTPUT 1L & OUTPUT 2R/CAPTURE OUT): Stereo outputs for connecting to studio monitors, PA systems, or FRFR cabs. OUTPUT 2R doubles as the Capture Out for creating Neural Captures.
10: Ground lift switch (GND): Helps to reduce unwanted noise caused by ground loops from external sources.
11 - 1/4" TRS expression and MIDI input (EXP/MIDI): Connect MIDI controllers, expression pedals, or additional footswitches to expand your control options. Read our guide on using MIDI with Nano Cortex for more information.
12 - 3.5mm TRS headphone output: Practice silently with headphones, perfect for late-night sessions or quiet environments.
13 - Headphone level knob: Adjust the volume of your headphones.
14 - USB-C port: Connect to your computer for studio-quality 24-bit, 48kHz audio recording. You can also power up with a USB-C compliant power source.
15 - Power input: 9-12V DC 600 mA input if you don’t power up using USB-C.

16 - BOOST switch: Boosts the Capture input by +26dB.
17 - CAPTURE INPUT: For creating Neural Captures.
Connecting directly to Nano Cortex

Step 1: Connect your instrument to the 1/4" instrument input (INPUT) using a standard 1/4" instrument cable.
Step 2: Connect your headphones to the 3.5mm TRS headphone output. You can adjust the volume of your headphones using the headphone level knob.
Step 3: Connect your studio monitors, PA, or FRFR cabinet to OUTPUT 1L and OUTPUT 2R.
Connect Nano Cortex to your amp
Connecting to your amp’s input
Step 1: Connect your instrument to the 1/4" instrument input (INPUT) on Nano Cortex using a standard 1/4" instrument cable.
Step 2: Connect the OUTPUT 1L (mono) of Nano Cortex to the input of your amplifier using a standard 1/4" instrument cable.
Connecting to your amp’s effects loop
Step 1: Connect your instrument to the 1/4" instrument input (INPUT) on Nano Cortex using a standard 1/4" instrument cable.
Step 2: Connect OUTPUT 1L (mono) of Nano Cortex to the return of your amplifier's effects loop using a standard 1/4" instrument cable.
Connecting Nano Cortex to a pedal board
If your Nano Cortex is part of a pedalboard setup, you can integrate it into your signal chain using the 1/4" instrument input (INPUT) and OUTPUTS 1L and 2R.

Scenario 1: Nano Cortex at the end of your pedalboard without an amp
Step 1: Connect your instrument to the input of the first pedal in your signal chain using a standard 1/4" instrument cable.
Step 2: Connect the output of the last pedal in your signal chain to the 1/4" instrument input (INPUT) on Nano Cortex using a standard 1/4" instrument cable.
Step 3: Connect the OUTPUTS 1L and 2R of Nano Cortex to your studio monitors, PA, or FRFR cab.
Scenario 2: Nano Cortex in the middle of your signal chain without an amp
Step 1: Connect your instrument to the input of the first pedal in your signal chain using a standard 1/4" instrument cable.
Step 2: Connect the output of the pedals that come before Nano Cortex in your signal chain to the 1/4" instrument input (INPUT) on Nano Cortex using a standard 1/4" instrument cable.
Step 3: Connect the OUTPUT 1L (mono) of Nano Cortex to the input of the next pedal in your signal chain using a standard 1/4" instrument cable.
Step 4: Connect the output of the last pedal in the chain to your studio monitors, PA, or FRFR cabinet.
Scenario 3: Nano Cortex at the beginning of your signal chain without an amp
Step 1: Connect your instrument to the 1/4" instrument input (INPUT) on Nano Cortex using a standard 1/4" instrument cable.
Step 2: Connect OUTPUT 1L (mono) of Nano Cortex to the input of the first pedal in your signal chain using a standard 1/4" instrument cable. If you're running a stereo setup, you can also connect OUTPUT 2R to another pedal/input.
Step 3: Connect the output of the last pedal in your signal chain to your studio monitors, PA, or FRFR cabinet.
Scenario 4: Nano Cortex at the end of your pedalboard with an amp
Step 1: Connect your instrument to the input of the first pedal in your signal chain using a standard 1/4" instrument cable.
Step 2: Connect the output of the last pedal in your signal chain to the 1/4" instrument input (INPUT) on Nano Cortex using a standard 1/4" instrument cable.
Step 3: Connect the OUTPUT 1L (mono) of Nano Cortex to the input of your amplifier using a standard 1/4" instrument cable.
Scenario 5: Nano Cortex in the middle of your pedalboard with an amp
Step 1: Connect your instrument to the input of the first pedal in your signal chain using a standard 1/4" instrument cable.
Step 2: Connect the output of the pedals that come before Nano Cortex in your signal chain to the 1/4" instrument input (INPUT) on Nano Cortex using a standard 1/4" instrument cable.
Step 3: Using standard 1/4" instrument cables, connect the OUTPUT 1L (mono) of Nano Cortex to the next pedal in your signal chain, and then connect that pedal’s output to your amplifier.
Scenario 6: Nano Cortex at the beginning of your pedalboard with an amp
Step 1: Connect your instrument directly to the 1/4" instrument input (INPUT) on Nano Cortex using a standard 1/4" instrument cable.
Step 2: Connect OUTPUT 1L (mono) of Nano Cortex to the input of the next pedal in your signal chain using a standard 1/4" instrument cable. If you're running a stereo setup, you can also connect OUTPUT 2R to another pedal/input.
Step 3: Connect the output of the last pedal in your signal chain to the input of your amplifier using a standard 1/4" instrument cable.
Scenario 7: Nano Cortex in your amp’s effects loop
Step 1: Connect your instrument to the input of the first pedal in your signal chain using a standard 1/4" instrument cable.
Step 2: Connect the output of the last pedal in this group to the input of your amplifier using a standard 1/4" instrument cable.
Step 3: Using a standard 1/4" instrument cable, connect the send from your amplifier’s effects loop to the 1/4" instrument input (INPUT) on Nano Cortex.
Step 4: If you have additional pedals that you want to place after Nano Cortex in the effects loop, connect the OUTPUT 1L (mono) of Nano Cortex to the input of the next pedal in your effects loop chain using a standard 1/4" instrument cable.
Step 5: Connect the output of the last pedal in your effects loop chain to the return of your amplifier’s effects loop using a standard 1/4" instrument cable.
Next steps
Now that we’ve covered the different ways to connect your Nano Cortex to your setup, it’s time to put it into action.
Make sure to read our guides on using Nano Cortex as an audio interface, using the Cortex Cloud app, and creating Neural Captures.
If you have any questions or need assistance, our support team is always here to help. You can reach us by emailing support@neuraldsp.com.
Guides for getting started with Nano Cortex
Connecting your gear to Nano Cortex