Knowledge base > Getting started
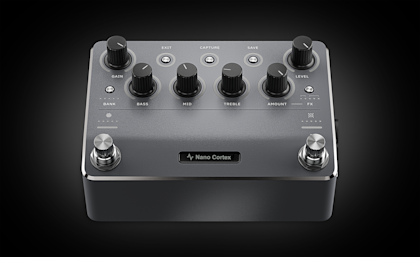
Using MIDI on Nano Cortex
This guide will walk you through the various ways to use MIDI with your Nano Cortex, including sending and receiving MIDI messages, configuring footswitches, and using MIDI with your DAW.
Overview
Nano Cortex supports MIDI, enabling you to connect external MIDI controllers such as footswitches and expression pedals to switch presets and control parameters.
You can receive MIDI messages through USB-C and TRS MIDI Type-A connections, and send MIDI messages to external devices via USB-C.
Additionally, many of Nano Cortex’s parameters can be controlled externally using an expression pedal.
These features allow you to trigger and automate preset changes, giving you enhanced control over your tone during your performances.
Receiving and sending MIDI messages over USB
Nano Cortex can receive and send MIDI messages via USB-C. To begin, connect your Nano Cortex to your computer via USB and configure it as your primary audio device.
For macOS® users:
Step 1: Connect your Nano Cortex to your Mac using the included USB Type-C cable.
Step 2: Set Nano Cortex as your audio device:
On your Mac, open ‘System Preferences’.
Navigate to ‘Sound’ and set Nano Cortex as the main Input and Output device.
Adjust the monitoring volume using your computer’s audio controls.
For Windows® users:
To use Nano Cortex as an audio device on Windows® computers, you’ll need to download and install the Nano Cortex ASIO® driver from our website.
Step 1: Download the Nano Cortex ASIO® driver from our downloads page.
Step 2: Run the installer and follow the on-screen instructions. Reboot your computer after the installation.
Step 3: After installing the driver, connect your Nano Cortex to your computer using the included USB Type-C cable.
Step 4: Set Nano Cortex as your audio device:
On your computer, open the ‘Control Panel’.
Navigate to ‘Hardware and Sound’, then select ‘Sound’.
Ensure that Nano Cortex is set as the default Playback and Recording device.
Adjust the monitoring volume using the computer’s audio controls.
Important: For optimal performance, please connect your Nano Cortex directly to your computer's motherboard USB ports (USB 2.0 or higher). Please refrain from using USB hubs or front panel USB ports on PC cases.
Receiving MIDI messages over USB
Loading Presets with MIDI

Preset slots are automatically assigned to Program Change (PC) messages from Program 0 to 63. To view the assigned PC messages, tap the PC/CC button at the top-right corner of the Presets list.
Step 1: Open your DAW and ensure Nano Cortex is recognized as both your audio device and MIDI device.
Step 2: Create a MIDI Track, route its output to Nano Cortex, and place PC messages in a MIDI clip.
Step 3: Nano Cortex will recall Presets from the Preset Library accordingly during playback.
Tip: To simplify recording, reamping, and receiving MIDI messages via USB with your Nano Cortex, we've created pre-configured DAW templates that streamline the setup process.
For more information and to download a template for your DAW of choice, read our guide on Nano Cortex DAW templates.
Sending MIDI messages over USB
Nano Cortex can send MIDI messages to external devices via USB-C by pressing Footswitches I and II, or, when loading a Preset.
Assigning MIDI messages to Footswitches I and II
You can assign up to 12 MIDI messages per footswitch that will be sent via USB simultaneously upon pressing a designated footswitch.

Step 1: Open the ‘USB MIDI Out Settings’ screen by tapping the contextual menu button in the upper-right corner of the app and selecting USB MIDI Out.
Step 2: Tap the Footswitches button in the top of the screen to access the ‘Footswitch’ menu.
Step 3: Configure the MIDI messages that are sent upon loading a preset:
Add message (+): Tap to create a MIDI message.
Footswitches: Tap to select which Footswitch you want to assign messages to. The MIDI messages assigned to the selected footswitch will be displayed on the screen.
Delete: Tap to delete a MIDI message.
Type: MIDI message type (CC or PC).
Channel: MIDI message Channel (1 to 16).
MIDI message components:
CC: CC# and Value.
PC: Bank CC#0, Bank CC#32, and Program.
Note: You can assign up to 12 MIDI messages per footswitch that will be sent via USB simultaneously upon pressing a designated footswitch.
Step 3: Tap the exit arrow at the top-left corner to close the ‘USB MIDI Settings’ screen.
Sending MIDI messages when loading a Preset
You can assign up to 12 MIDI messages per Preset that will be sent via USB simultaneously when a designated Preset is loaded. These messages are configured using the Cortex Cloud app.
Step 1: Open the ‘USB MIDI Out Settings’ screen by tapping the contextual menu button in the upper-right corner of the app and selecting USB MIDI Out.

Step 2: Configure the MIDI messages that are sent upon loading a preset:
Add message (+): Tap to create a MIDI message.
Current preset: Tap to access the Preset List. Choose a Preset to assign MIDI messages to it. You can assign MIDI messages to multiple Presets.
Delete: Tap to delete a MIDI message.
Type: MIDI message type (CC or PC).
Channel: MIDI message Channel (1 to 16).
MIDI message components:
CC: CC# and Value.
PC: Bank CC#0, Bank CC#32, and Program.
Note: You can assign up to 12 MIDI messages per Preset that will be sent via USB simultaneously when a designated Preset is loaded.
Step 3: Tap the exit arrow at the top-left corner to close the USB MIDI Settings screen.
Receiving MIDI messages over TRS MIDI Type-A connections
Nano Cortex can receive MIDI messages from external MIDI controllers via TRS MIDI Type-A connections.
Compatible MIDI controllers
Nano Cortex is compatible with any external MIDI controller that uses TRS MIDI Type-A connections and is capable of sending Control Change (CC) and Program Change (PC) commands.
Below are some examples of compatible footswitches:
Nektar Pacer
Morningstar MC6
Behringer FCB1010
Harley Benton MP-100
Fortin Hydra
Enabling incoming MIDI over TRS in Nano Cortex
Follow these steps to enable incoming MIDI over TRS on your Nano Cortex:

Step 1: Open the Cortex Cloud app, tap the contextual menu button in the upper-right corner, and navigate to the 'Settings' screen.
Step 2: Ensure the EXP/MIDI operation mode is set to MIDI.
Connecting your MIDI controller to Nano Cortex via TRS

Step 1: Open the Cortex Cloud app and ensure that the EXP/MIDI operation mode is set to MIDI in the 'Settings' screen.
Step 2: Connect your MIDI controller's MIDI OUT to Nano Cortex's EXP/MIDI input using a TRS MIDI Type-A cable.
Step 3: Configure your MIDI controller to send PC messages (Program 0 to 63). Refer to your MIDI controller's manual for detailed instructions on how to do this.
Triggering Preset changes with MIDI over TRS
Preset slots are automatically assigned to Program Change (PC) messages from Program 0 to 63. To view the assigned PC messages, tap the PC/CC button at the top-right corner of the Presets list.
Step 1: Open the Cortex Cloud app and ensure that the EXP/MIDI operation mode is set to MIDI in the 'Settings' screen.
Step 2: Connect your MIDI controller's MIDI OUT to Nano Cortex's EXP/MIDI input using a TRS MIDI Type-A cable.
Step 3: Configure your MIDI controller to send PC messages (Program 0 to 63). Refer to your MIDI controller's manual for detailed instructions on how to do this.
Step 4: Nano Cortex will recall Presets from the Preset Library according to the Program Change messages received.
Using expression pedals with Nano Cortex
Nano Cortex allows you to control various parameters externally using a compatible expression pedal.
Compatible expression pedals
Nano Cortex is compatible with any expression pedal that meets the following requirements:
TRS Connector: A single TRS expression output is required. Wah or volume outputs are not supported.
Curve: Both linear and logarithmic curves will work properly after calibration.
Toe-switches: Latching and momentary switches are supported. Momentary switches will only work when Latching Mode is active.
Additional controls: Range control knobs and polarity switches are also supported.
Below are some examples of compatible expression pedals:
Nektar NX-P
Mission Engineering SP-1
M-Audio EX-P
Roland EV-5
HoTone Soul Press
Electro-Harmonix Expression Pedal
Boss FV-500-L
Dunlop DVP 3
Dunlop DVP 4
DOD FX-17
Enabling expression pedal support on Nano Cortex
Follow these steps to enable expression pedal support on your Nano Cortex:
Step 1: Open the Cortex Cloud app, tap the contextual menu button in the upper-right corner, and navigate to the 'Settings' screen.
Step 2: Ensure the EXP/MIDI operation mode is set to EXPRESSION PEDAL.
Calibrating your expression pedal
For optimal performance, calibrate your expression pedal during its first use:

Step 1: Place the expression pedal on the surface where it will be used.
Step 2: Connect your expression pedal to the Nano Cortex's EXP/MIDI input using a TRS cable.
Step 3: Open the Cortex Cloud app, tap the contextual menu button in the upper-right corner, and navigate to the 'Settings' screen. Ensure the EXP/MIDI operation mode is set to Expression Pedal.
Step 4: Navigate to the Range Calibration section of the ‘Settings’ screen and tap Recalibrate.
Step 5: Rock the expression pedal from the heel position to the toe position to complete the calibration.
Step 6: Tap Save to finalize the calibration.
Note: The calibration settings will remain active until a new calibration is performed.
Assigning expression pedal functions
You can assign your expression pedal to control various parameters on your Nano Cortex:

Step 1: Open the Cortex Cloud app, tap the contextual menu button in the upper-right corner, and select Expression Pedal.
Step 2: Choose the parameters you want to control with the expression pedal. You can control the GAIN, BASS, MID, TREBLE, and AMOUNT parameters with your expression pedal. Multiple parameters can be assigned simultaneously.
Step 3: By default, the expression pedal will range from 0 to 100%. You can adjust this range by dragging the edges of the bar to limit it.
Step 4: To reverse the expression pedal behavior (swapping heel and toe positions), tap the button in the upper-right corner.
Step 5: To delete the assignment, tap the button in the top-left corner.
Using expression pedals for slot bypass
You can also assign your expression pedal to bypass the Neural Capture, IR Loader, and Effects Slots:

Step 1: Open the Cortex Cloud app, tap the contextual menu button in the upper-right corner, and select Expression Pedal.
Step 2: Tap the slots you want to bypass with your expression pedal. You can assign multiple slots simultaneously.
Step 3: Tap the 'Switch on' field to navigate through the different bypass modes:
SWITCH: Pressing the toe switch of your expression pedal will bypass or engage the slot.
Note: Momentary switches will only work when Latching Mode is active. To activate Latching Mode, open the Cortex Control app, tap the contextual menu button in the upper-right corner, navigate to the ‘Settings’ screen, and disable the Catch Knobs Instantly setting under Knob Operation Mode.
STOP: Keeping the pedal still will bypass the slot. Adjust the SWITCH DELAY bar to set the delay time (up to 2000ms).
HEEL-TOE: The slot will bypass when the pedal is at the heel position. Adjust the SWITCH DELAY bar to set the delay time (up to 2000ms).
Step 4: To reverse the expression pedal behavior (swapping heel and toe positions), tap the button in the upper-right corner.
Step 5: To delete the assignment, tap the button in the top-left corner.
Next steps
MIDI allows you to control your Nano Cortex with external MIDI controllers, such as footswitches and expression pedals. Additionally, by connecting your Nano Cortex to a computer and using a DAW, you can automate your Preset changes for your performances. Be sure to check out our Nano Cortex DAW templates, which have pre-configured MIDI channels to streamline the setup process.
Additionally, make sure to read our guides on using Nano Cortex as an audio interface, creating and managing presets, and using the Cortex Cloud app.
If you have any questions or need assistance, our support team is here to help. You can reach us by emailing support@neuraldsp.com.
Guides for getting started with Nano Cortex
Using MIDI on Nano Cortex