Knowledge base > Getting started
Using Nano Cortex as an audio interface
This guide will walk you through the process of setting up your Nano Cortex as an audio interface.
Overview
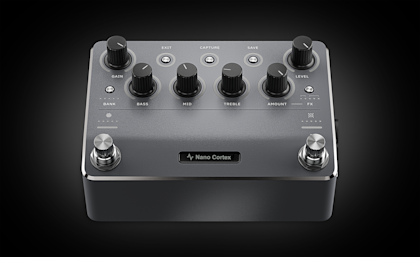
Nano Cortex Cortex doubles as a 24-bit, fixed 48kHz, low-latency audio interface for Windows® and Mac® computers.
It features one 1 input, 2 hardware outputs, and 7 USB channels (4 inputs/ 3 outputs) and is compatible with all major DAWs.
This makes Nano Cortex an ideal all-in-one solution for processing and recording guitar and bass tones.
Setting Nano Cortex up as an audio interface
To begin, connect your Nano Cortex to your computer via USB and configure it as your primary audio device.
For macOS® users:
Step 1: Connect your Nano Cortex to your Mac using the included USB Type-C cable.
Step 2: Set Nano Cortex as your audio device:
On your Mac, open ‘System Preferences’.
Navigate to ‘Sound’ and set Nano Cortex as the main Input and Output device.
Adjust the monitoring volume via audio controls per application.
For Windows® users:
To use Nano Cortex as an audio device on Windows® computers, you’ll need to download and install the Nano Cortex ASIO® driver from our website.
Step 1: Download the Nano Cortex ASIO® driver from our downloads page.
Step 2: Run the installer and follow the on-screen instructions. Reboot your computer after the installation.
Step 3: After installing the driver, connect your Nano Cortex to your computer using the included USB Type-C cable.
Step 4: Set Nano Cortex as your audio device:
On your computer, open the ‘Control Panel’.
Navigate to ‘Hardware and Sound’, then select ‘Sound’.
Ensure that Nano Cortex is set as the default Playback and Recording device.
Adjust the monitoring volume via audio controls per application.
Important: For optimal performance, please connect your Nano Cortex directly to your computer's motherboard USB ports (USB 2.0 or higher). Please refrain from using USB hubs or front panel USB ports on PC cases.
Monitoring
Connecting your monitoring devices
Outputs 1L and 2R and the headphones output are used for plugging in monitoring devices such as studio monitors and headphones.

Step 1: Connect your headphones to HP OUTPUT. Adjust the headphone volume with the headphone level knob.
Step 2: Connect your studio monitors to OUTPUT 1L and 2R.
DAW routing and recording
Recording your processed signal and dry input with Nano Cortex is simple and easy.
You’ll hear your signal directly from Nano Cortex before it’s routed through your DAW, resulting in ultra-low latency monitoring. This eliminates the need for DAW input monitoring, so make sure to turn off input monitoring on your audio tracks.
Additionally, ensure that Nano Cortex is set as the main audio device in your DAW settings before you begin recording.
Recording your processed signal
Step 1: Plug your instrument into the 1/4" instrument input (INPUT).
Step 2: Open your DAW, create a stereo audio track, and set its input to Input 3/4.
Step 3: Arm the track for recording and press record.
Recording your DI signal
Step 1: Plug your instrument into the 1/4" instrument input (INPUT).
Step 2: Open your DAW, create a mono audio track, and set its input to Input 1.
Step 3: Arm the track for recording and press record.
Recording your processed signal and DI signal simultaneously
Step 1: Plug your instrument into the 1/4" instrument input (INPUT).
Step 2: Open your DAW, create a stereo audio track, and set its input to Input 3/4. This track will capture your processed signal.
Step 3: Open your DAW, create a mono audio track, and set its input to Input 1. This track will capture your DI signal.
Step 4: Arm both tracks for recording and press record.
Reamping on Nano Cortex
Step 1: Plug your instrument into the 1/4" instrument input (INPUT).
Step 2: Create a mono audio track and set the input to Input 1 on Nano Cortex. This track will capture the dry DI signal.
Step 3: Arm the mono track for recording and record your performance. This dry signal will serve as the source for reamping.
Step 4: Create a stereo audio track and set the input to Input 3/4 on Nano Cortex. This will capture the processed signal, including your amp, cab, and effects.
Step 5: In your DAW, go to your DI track's output routing settings and select Output 3 as its output. This sends the signal back to the input on Nano Cortex for reprocessing.
Logic Pro X: Use the track’s output routing options in the mixer.
Ableton Live: Select Output 3 from the track’s 'Audio To' dropdown in the Session view.
Pro Tools: Use the I/O setup to assign your DI track's output.
REAPER: Use the route button on the track to set the output.
Cubase: Use the routing section in the inspector or the MixConsole.
FL Studio: Use the mixer channel’s output selector.
If needed, refer to your DAW's manual for detailed instructions on routing.
Step 5: Disarm the mono track from recording and arm the stereo track to record the reamped signal. Any adjustments you make to your amp, cab, and effects on Nano Cortex will be reflected in this track.
USB I/O schematic
Nano Cortex has 7 USB channels (4 inputs/ 3 outputs).
This mapping determines the source of audio for inputs and the destination for outputs when using Nano Cortex as an audio interface:

Using Nano Cortex as an audio interface with Neural DSP plugins
Note: This section covers how to use Neural DSP plugins on your computer while Nano Cortex functions as your audio interface. Plugin compatibility (PCOM) will not be implemented on Nano Cortex. This is because Neural DSP plugins use amp modeling technology, which differs significantly from the Neural Capture technology that Nano Cortex uses, making the plugins incompatible with Nano Cortex.
To use Neural DSP plugins with Nano Cortex as your audio interface, you’ll need to mute the input signal to prevent Nano Cortex from outputting its own audio while using the plugins.

Step 1: Engage the Tuner on your Nano Cortex by pressing and holding down Footswitch II for 2 seconds in Performance Mode.

Note: If you hear the input signal when the Tuner is engaged, press-and-hold Footswitch II for 1 second to mute or unmute the input signal.
Using the standalone versions of Neural DSP plugins
Step 1: Launch the standalone version of your Neural DSP plugin and open the settings menu.
Step 2: Use the following audio device settings:
For macOS® users:
Audio Device Type: Core Audio
Audio Input Device: Nano Cortex
Audio Output Device: Nano Cortex
For Windows® users:
Audio Device Type: ASIO
Audio Input Device: Nano Cortex
Step 3: Configure the remaining settings:
Audio Input Channels: Input 1
Audio Output Channels: Output 1 and 2
Sample rate: 48000 Hz
Audio Buffer Size: Set it to 128 samples or lower.
Loading Neural DSP plugins in a DAW
Step 1: Ensure that Nano Cortex is set as your audio device in your DAW settings.
Step 2: Create an audio track and set its input to Input 1. Make sure input monitoring is turned on.
Step 3: Load a Neural DSP plugin onto the track. For more detailed instructions, refer to our guide on loading plugins in your DAW.
Connecting Nano Cortex to an iPhone® or iPad®
Nano Cortex can also be used as an audio interface with iPhones® and iPads®, allowing you to record directly into apps like GarageBand®.
If your iPhone® or iPad® is equipped with USB-C, simply use a USB-C cable to connect your device to Nano Cortex.
Older generation devices will require the Apple® Lightning to USB-C Camera Adapter to recognize Nano Cortex as an external audio device.
Step 1: Use the appropriate cable or adapter to connect your Nano Cortex to your iPhone® or iPad®.
Step 2: Once connected, Nano Cortex will function as the primary audio device for your iPhone® or iPad®.
MIDI over USB
Nano Cortex can receive and send MIDI messages via USB-C.
For more detailed information on Nano Cortex’s MIDI capabilities, refer to our guide on using MIDI with Nano Cortex.
Receiving MIDI messages via USB
Loading Presets with MIDI

Preset slots are automatically assigned to Program Change (PC) messages from Program 0 to 63. To view the assigned PC messages, tap the PC/CC button at the top-right corner of the Presets list.
Step 1: Open your DAW and ensure Nano Cortex is recognized as both your audio device and MIDI device.
Step 2: Create a MIDI Track, route its output to Nano Cortex, and place PC messages in a MIDI clip.
Step 3: Nano Cortex will recall Presets from the Preset Library accordingly during playback.
Sending MIDI messages via USB
Nano Cortex can send MIDI messages to external devices via USB-C by pressing Footswitches I and II, or, when loading a Preset.
Assigning MIDI messages to Footswitches I and II
You can assign up to 12 MIDI messages per footswitch that will be sent via USB simultaneously upon pressing a designated footswitch.

Step 1: Open the ‘USB MIDI Out Settings’ screen by tapping the contextual menu button in the upper-right corner of the app and selecting USB MIDI Out.
Step 2: Tap the Footswitches button in the top of the screen to access the ‘Footswitch’ menu.
Step 3: Configure the MIDI messages that are sent upon loading a preset:
Add message (+): Tap to create a MIDI message.
Footswitches: Tap to select which Footswitch you want to assign messages to. The MIDI messages assigned to the selected footswitch will be displayed on the screen.
Delete: Tap to delete a MIDI message.
Type: MIDI message type (CC or PC).
Channel: MIDI message Channel (1 to 16).
MIDI message components:
CC: CC# and Value.
PC: Bank CC#0, Bank CC#32, and Program.
Note: You can assign up to 12 MIDI messages per footswitch that will be sent via USB simultaneously upon pressing a designated footswitch.
Step 3: Tap the exit arrow at the top-left corner to close the USB MIDI Settings screen.
Sending MIDI messages when loading a Preset
You can assign up to 12 MIDI messages per Preset that will be sent via USB simultaneously when a designated Preset is loaded. These messages are configured using the Cortex Cloud app.
Step 1: Open the ‘USB MIDI Out Settings’ screen by tapping the contextual menu button in the upper-right corner of the app and selecting USB MIDI Out.

Step 2: Configure the MIDI messages that are sent upon loading a preset:
Add message (+): Tap to create a MIDI message.
Current preset: Tap to access the Preset List. Choose a Preset to assign MIDI messages to it. You can assign MIDI messages to multiple Presets.
Delete: Tap to delete a MIDI message.
Type: MIDI message type (CC or PC).
Channel: MIDI message Channel (1 to 16).
MIDI message components:
CC: CC# and Value.
PC: Bank CC#0, Bank CC#32, and Program.
Note: You can assign up to 12 MIDI messages per Preset that will be sent via USB simultaneously when a designated Preset is loaded.
Step 3: Tap the exit arrow at the top-left corner to close the USB MIDI Settings screen.
Nano Cortex DAW templates
To simplify recording, reamping, and receiving MIDI messages via USB with your Nano Cortex, we've created pre-configured DAW templates that streamline the setup process.
The templates are available for the following DAWs. Note: Please ensure you're using at least the minimum required version listed below for compatibility:
Ableton Live: Version 12 or later
Cubase: Version 13 or later
Logic Pro: Version 11 or later
Pro Tools: Version 2024.6 or later
REAPER: Version 7 or later
Each template comes pre-configured with the appropriate track settings and input/output routing for recording and reamping. Additionally, MIDI tracks are set up so you can automate Preset changes.
For more information and to download a template for your DAW of choice, read our guide on Nano Cortex DAW templates.
Next steps
With your Nano Cortex set up as an audio interface, you're ready to start recording your music.
Be sure to download our Nano Cortex DAW templates and explore our guides on using the Cortex Cloud app, using MIDI on Nano Cortex, and creating Neural Captures.
If you have any questions or need assistance, our support team is here to help. You can reach us by emailing support@neuraldsp.com.
Guides for getting started with Nano Cortex
Using Nano Cortex as an audio interface