Knowledge base > Getting started
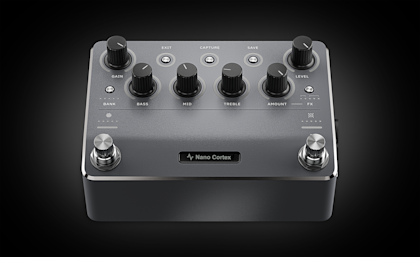
Nano Cortex DAW templates
To make recording and reamping even easier with Nano Cortex, we have created pre-configured DAW templates for all major DAWs. This guide will walk you through using the templates.
Overview
We've created these DAW templates for Nano Cortex to simplify the process of recording and reamping. The templates are pre-configured to set up tracks for recording your DI signal, processed sound, and reamping. Additionally, they include a MIDI track for automating preset changes.
Supported DAWs
The templates are available for the following DAWs. Note: Please ensure you're using at least the minimum required version listed below for compatibility:
Ableton Live: Version 12 or later
Cubase: Version 13 or later
Logic Pro: Version 11 or later
Pro Tools: Version 2024.6 or later
REAPER: Version 7 or later
Requirements
To use these templates, your Nano Cortex must be set as your audio interface. For detailed setup instructions, please refer to our guide on using Nano Cortex as an audio interface.
Download the templates here
Structure of DAW template
Tracks for recording and reamping
Track 1: DI SIGNAL
A mono track with its input set to Input 1 on Nano Cortex. This track is for capturing your dry DI signal.
Track 2: WET SIGNAL
A stereo track with its input configured to Input 3/4 on Nano Cortex. This track is for recording your wet processed signal.
Track 3: REAMP OUT
A mono track that routes its output to Output 3 on Nano Cortex. This track is for reamping.
Multi-track guitar setup
Guitar 1
Track 4: GTR 1 DI
A mono track with its input set to Input 1 on Nano Cortex.
Track 5: GTR 1 WET
A stereo track with its input set to Input 3/4 on Nano Cortex.
Track 6: GTR 1 REAMP OUT
A mono track that routes its output to Output 3 on Nano Cortex. This track is for reamping.
Guitar 2
Track 7: GTR 2 DI
A mono track with its input set to Input 1 on Nano Cortex.
Track 8: GTR 2 WET
A stereo track with its input set to Input 3/4 on Nano Cortex.
Track 9: GTR 2 REAMP OUT
A mono track that routes its output to Output 3 on Nano Cortex. This track is for reamping.
MIDI track for automating Preset changes
Track 10: PRESET RECALL
This track is used to automate preset changes on your Nano Cortex during a session.
It sends Program Change (PC) messages to Nano Cortex, allowing you to automatically switch between presets as your session plays. By default, the track sends PC messages from 0 to 9, which correspond to the first 10 presets on Nano Cortex, triggering a new preset every bar (4/4, 120 BPM).
This is particularly useful for live performances or recording sessions where multiple tones are needed.
Loading the Nano Cortex DAW templates on your DAW
The Nano Cortex DAW templates are packaged in a single .rar file. Follow the steps below to get started:
Step 1: Before loading the templates, ensure that your Nano Cortex is configured as your audio interface. If you need help with this, refer to our guide on using Nano Cortex as an audio interface.
Step 2: Download the .rar file from this link and extract its contents to a location on your computer.
Step 3: Inside the extracted folder, you’ll find separate directories for Windows® and macOS®. Open the folder that corresponds to your operating system.
Step 4: Within the folder, locate the template file that matches your DAW. Each template is named according to the DAW it was created for.
Step 5: Open your DAW and load the template file by following these steps:
Ableton Live: Go to ‘File > Open Live Set’, and navigate to the location of your downloaded template. Select the template file and click Open.
Cubase: Go to ‘File > Open’, navigate to your downloaded template file, select it, and click Open.
Logic Pro: In Logic Pro, go to ‘File > Open’, locate the template file, and click Open.
Pro Tools: Go to ‘File > Open Session’, find your downloaded template file, select it, and click Open.
REAPER: Go to ‘File > Open Project’, navigate to the template file, select it, and click Open.
If needed, refer to your DAW's manual for detailed instructions on loading templates.
With the template loaded, you’re ready to start recording, reamping, and automating preset changes with your Nano Cortex.
Using the templates
Example 1: Recording DI and wet signals simultaneously
When recording guitar or bass, it’s recommended to capture both your DI and wet signals simultaneously. This approach gives you maximum flexibility during mixing and production.
The DI signal is the unprocessed version of your performance that can be reamped and further processed later, while the wet signal captures the tone you dialed in during the session.
By recording both, you can easily make adjustments to your tone without the need to re-record your performance.
Step 1: Load the template in your DAW.
Step 2: Arm the DI SIGNAL track to record the DI signal directly from your guitar.
Step 3: Arm the WET SIGNAL track to capture the processed tone coming out of your Nano Cortex.
Step 4: Hit record and play your part. The DAW will simultaneously record both the DI and wet signals, giving you the flexibility to reamp later.
Example 2: Reamping a previously recorded DI track
Reamping allows you to experiment with different tones and effects on a recorded DI track without needing to re-record the performance.
Step 1: Load the template and import the previously recorded DI track onto the DI SIGNAL track. Do not arm this track for recording.
Step 2: Dial in your tone on your Nano Cortex.
Step 3: Arm the REAMP OUT track for recording, then press record. After pressing record, your DAW will capture the processed signal from the Nano Cortex, allowing you to hear and save the newly reamped tone while keeping the original DI track intact.
Example 3: Automating Preset changes during a session
For projects or performances that use multiple Presets, you can use the PRESET RECALL track to automate preset changes.
Preset slots are automatically assigned to Program Change (PC) messages from Program 0 to 63. To view the assigned PC messages, tap the PC/CC button at the top-right corner of the Presets list.
Step 1: Load the template in your DAW.
Step 2: Use the PRESET RECALL track to insert Program Change (PC) messages at specific points in the timeline.
If needed, refer to your DAW's manual for detailed instructions on setting Progam Change messages to MIDI clips.
Step 3: Each PC message will trigger Nano Cortex to switch to a different preset at the designated time. Play back the session to verify that the preset changes at the correct points.
Next steps
Now that you have the Nano Cortex DAW templates set up, you can focus on recording and creating your own music.
Download the Nano Cortex DAW templates from this link.
Make sure you read our guides on using Nano Cortex as an audio interface, creating and managing Presets, and using the Cortex Cloud app.
If you have any questions or need further assistance, our support team is here to help. You can reach us by emailing support@neuraldsp.com.
Guides for getting started with Nano Cortex
Nano Cortex DAW templates