Knowledge base > Getting started
Nano Cortex quick start guide
This guide will help you set up your Nano Cortex quickly.
Quick start guide video
Turning on your Nano Cortex
Connect your Nano Cortex to the power source.

After a few seconds, the BANK, CAPTURE, FX, and IR LEDs will light up indicating that Nano Cortex is powering on.

Once the booting sequence completes, Nano Cortex will enter Performance Mode.
Power sources
Nano Cortex can be powered by two different sources:
External power supply: Nano Cortex requires a center-negative power supply that provides 9-12V DC and at least 600mA, using a standard 2.1/5.5mm DC connector.
USB-C: Nano Cortex can also be powered via USB-C (5V-1.5A). Connect the unit to your computer or another USB-C compliant power source with the included USB-C cable.


Turning off your Nano Cortex

Disconnect the Nano Cortex from the power source to power off the device.
Connecting your gear

Connect your instrument to INPUT.
Connect your studio monitors, PA, or FRFR cabinet to OUTPUT 1L and 2R. Additionally, you can connect your Headphones to HP OUTPUT.

If your Nano Cortex is part of a bigger pedalboard setup, use INPUT and OUTPUTS 1L/2R to place it wherever you need it in the audio chain.
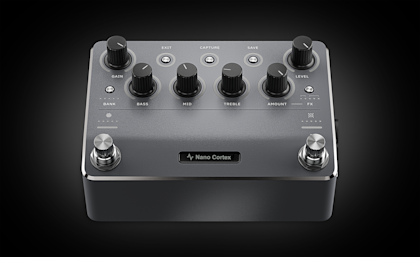
Global controls

Turn GAIN, BASS, MID, and TREBLE knobs clockwise and counterclockwise to control the Capture parameters.
Turn LEVEL to control the master output volume (OUTPUT 1L and 2R).
Use the HP OUT knob on the back to control the headphones output volume.

Press BANK to cycle through Capture banks.

Turn Footswitch I clockwise or counterclockwise to navigate Capture slots.
All the LEDs will turn on when using a Neural Capture from the library that is not currently assigned to any slot.
Navigate to the last position, where the LEDs are not lit, to bypass the Neural Capture.

Press Footswitch I to toggle between Presets IA and IB. Different Presets can be assigned on the Cortex Cloud app.

Press Footswitch II to toggle between Presets IIA and IIB. Different Presets can be assigned on the Cortex Cloud app.

Press FX to cycle through effect slots. Press-and-hold FX to bypass/enable the currently selected effect.

Turn the AMOUNT knob clockwise or counterclockwise to change how much of the selected effect is applied.

Turn Footswitch II clockwise or counterclockwise to navigate IR slots.
All the LEDs will turn on when using an IR from the library that is not currently assigned to any slot.
Navigate to the last position, where the LEDs are not lit, to bypass the IR Loader.

Press-and-hold Footswitch II for 2 seconds to access the Tuner. Press Footswitch II to exit the Tuner.

EXIT, CAPTURE, and SAVE buttons are reserved for the Neural Capture process, Preset saving, and Bluetooth pairing.
Neural Capture quick start guide
Neural Capture is a powerful tool that can learn and replicate the sonic characteristics of any amplifier, cabinet, or overdrive pedal with unprecedented accuracy and realism.
To create a Neural Capture, connect Nano Cortex to an overdrive pedal, a mic’d up cabinet, or an amplifier via a reactive load box.
Connection diagram

Press CAPTURE to access Capture Mode. In this mode, the CAPTURE LED ring will stay on.
1. Reference instrument
Connect your instrument to INPUT.
2. Monitoring devices
Connect your headphones to HP OUTPUT or your Monitor Speaker to OUTPUT 1L.
3. Target device
Connect the Nano Cortex's OUTPUT 2R (CAPTURE OUT) to the target device's input.
4. Return to Nano Cortex
Connect the target device's output to the Nano Cortex's CAPTURE INPUT.
5. Capture input gain

Set the CAPTURE INPUT level by adjusting the GAIN knob.
6. Capture

Press-and-hold CAPTURE for 3 seconds to begin the Capture process.

The CAPTURE LED ring will light up progressively as soon as the process begins.
7. Test and save

Press Footswitch I to toggle between the Neural Capture and the Target Device.

Press SAVE to store the recently created Capture. Choose a BANK, a Capture Slot, and press-and-hold SAVE for 3 seconds to store your Neural Capture.
Cortex Cloud app pairing

Deeper Preset customization and additional features are available via the Cortex Cloud app.
Bluetooth pairing

Open the Cortex Cloud app on your smartphone, access the Devices menu, and tap Add New. Your smartphone will start searching for nearby Nano Cortex units.

Press-and-hold EXIT and CAPTURE for 1 second to put your Nano Cortex into Pairing Mode.
The GAIN LED ring will illuminate clockwise and the Footswitch I's LED will blink slowly, indicating that Nano Cortex is in pairing mode.

Once paired, the app will show the current Nano Cortex configuration.

During Pairing Mode, press EXIT to return to Performance Mode.
Parameter lock
It's possible to temporarily disable the rotary functionality of knobs and footswitches to avoid unwanted parameter switching when performing.

Press-and-hold EXIT for 3 seconds to toggle the Parameter Lock.

The EXIT LED ring will indicate when the Parameter Lock is enabled.
I/O clipping alert
The GAIN and LEVEL knobs will indicate whenever inputs or outputs are clipping.
Performance mode

The GAIN Knob will blink 3 times whenever INPUT detects signal clipping.

The LEVEL Knob will blink 3 times whenever OUTPUTS 1L/2R detect signal clipping.
Capture mode

The GAIN Knob will turn red whenever CAPTURE INPUT detects signal clipping.

The LEVEL Knob will blink 3 times whenever OUTPUTS 1L/2R detect signal clipping.
Guides for getting started with Nano Cortex
Nano Cortex quick start guide