Knowledge base > Getting started
Reamping on Nano Cortex
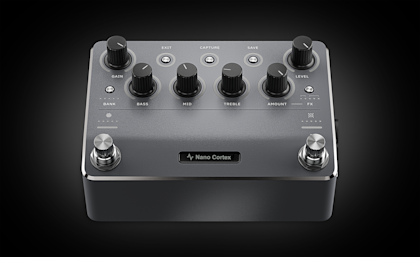
In this guide, we'll walk you through the step-by-step process of reamping with your Nano Cortex. Reamping is a technique where you take a recorded dry guitar signal and run it through different amp and cab combinations. This allows you to shape your tone without having to re-record your parts.
Overview
Reamping on Nano Cortex is straightforward and efficient. By connecting your Nano Cortex to your computer, it doubles as a fully-fledged 24-bit, 48kHz (fixed), low-latency audio interface with 7 USB Channels (4 in/3 out). This gives you everything you need to record and reamp with studio-grade sound quality directly on your computer.
Nano Cortex is compatible with Windows® and Mac® computers and supports all major DAWs. For more information, read our guide on using Nano Cortex as an audio interface.
Connect Nano Cortex to your computer
To begin reamping with your Nano Cortex, you'll need to connect it to your computer via USB and configure it as your main audio device.
For macOS® users:
Step 1: Connect your Nano Cortex to your Mac using the included USB Type-C cable.
Step 2: Set Nano Cortex as your audio device:
On your Mac, open ‘System Preferences’.
Navigate to ‘Sound’ and set Nano Cortex as the main Input and Output device.
Adjust the monitoring volume using your computer’s audio controls.
For Windows® users:
To use Nano Cortex as an audio device on Windows computers, you’ll first need to download and install the Nano Cortex ASIO® driver from our website.
Step 1: Download the Nano Cortex ASIO® driver from our downloads page.
Step 2: Run the installer and follow the on-screen instructions. Reboot your computer after the installation.
Step 3: After installing the driver, connect your Nano Cortex to your computer using the included USB Type-C cable.
Step 4: Set Nano Cortex as your audio device:
On your computer, open the ‘Control Panel’.
Navigate to ‘Hardware and Sound’, then select ‘Sound’.
Ensure that Nano Cortex is set as the default Playback and Recording device.
Adjust the monitoring volume using the computer’s audio controls.
Important: For optimal performance, please connect your Nano Cortex directly to your computer's motherboard USB ports (USB 2.0 or higher). Please refrain from using USB hubs or front panel USB ports on PC cases.
Reamping on Nano Cortex
Once Nano Cortex is configured as your audio interface, follow these steps to set up your DAW for reamping.
Step 1: In your DAW, create a mono audio track and set the input to Input 1 on Nano Cortex. This track will capture the dry DI signal.
Step 2: Arm the mono track for recording and record your performance. This dry signal will serve as the source for reamping.
Step 3: Create a stereo audio track and set the input to Input 3/4 on Nano Cortex. This will capture the processed signal, including your amp, cab, and effects.
Step 4: In your DAW, go to your DI track's output routing settings and select Output 3 as its output. This sends the signal back to the input on Nano Cortex for reprocessing.
Logic Pro X: Use the track’s output routing options in the mixer.
Ableton Live: Select Output 3 from the track’s 'Audio To' dropdown in the Session view.
Pro Tools: Use the I/O setup to assign your DI track's output.
REAPER: Use the route button on the track to set the output.
Cubase: Use the routing section in the inspector or the MixConsole.
FL Studio: Use the mixer channel’s output selector.
If needed, refer to your DAW's manual for detailed instructions on routing.
Step 5: Disarm the mono track from recording and arm the stereo track to record the reamped signal. Any adjustments you make to your amp, cab, and effects on Nano Cortex will be reflected in this track.
Nano Cortex DAW templates for recording and reamping
To make recording and reamping even easier with your Nano Cortex, we've created pre-configured DAW templates that streamline the setup process.
The templates are available for the following DAWs. Note: Please ensure you're using at least the minimum required version listed below for compatibility:
Ableton Live: Version 12 or later
Cubase: Version 13 or later
Logic Pro: Version 11 or later
Pro Tools: Version 2024.6 or later
REAPER: Version 7 or later
Each template is pre-configured with the appropriate track settings and input/output routing for recording and reamping with Nano Cortex.
For more information and to download a template for your DAW of choice, read our guide on Nano Cortex DAW templates.
Next steps
Reamping allows you to experiment with different tones without re-recording your parts, giving you the flexibility and creative control to perfect your final mix.
To further streamline your workflow, download our pre-configured Nano Cortex DAW templates. For detailed information on using these templates, and to download one for your preferred DAW, be sure to read our guide on Nano Cortex DAW templates.
We also have guides on using Nano Cortex as an audio interface and choosing the best DAW for your needs.
If you have any questions or need assistance, our support team is always here to help. You can contact us by emailing support@neuraldsp.com.
Guides for getting started with Nano Cortex
Reamping on Nano Cortex
