

How to use a compressor pedal
In this article we'll dive into the world of compressor pedals and go over what they are, how they are used, and give tips on how to dial them in.
Overview
Compressor pedals are essential tools for giving you a balanced and well-defined tone. They level out the dynamics of your guitar signal by boosting quieter parts and reducing louder spikes.
Whether you’re delicately fingerpicking or aggressively strumming, compressors ensure that your playing maintains a steady and even volume across the entire performance.
You can think of them as a kind of automatic volume knob that makes sure your quieter notes don't get lost and your loudest chords don't overpower everything else.
A compressor won’t drastically change your tone like other effects such as distortion, overdrive, or delay. When you turn one on, you likely won’t notice a dramatic change in your sound. However, you'll definitely feel it when playing.
It will make your guitar more responsive, your notes ring out easier, and slightly increase the sustain making your playing feel “easier” and smoother.
In this article we'll dive into the world of compressor pedals and go over what they are, how they are used, and give tips on how to dial them in.

What does a compressor pedal do?
Compressor pedals even out the dynamics of your guitar signal. Simply put, when you hit a string hard, the compressor dampens the loudness. When you play softly, it amplifies the sound.
The outcome is a steadier signal level that ensures that every note you play is heard loud and clear without volume spikes that can disrupt the overall mix.
Beyond evening out the dynamics of your signal, compressors are used typically used for:
Increasing sustain: a compressor can help notes ring out longer. When a note starts to decay, the compressor can automatically boost its level, resulting in increased sustain. Lead guitarists often use compressors because of this.
Making fingerpicked parts more pronounced: fingerstyle guitarists often use compressors to ensure that each note they play, whether plucked with the thumb or fingers, is heard clearly and with an equal volume.
Making clean tones sound more polished: when used with a clean tone, a compressor can give you a more polished sound, making every chord and note sparkle a bit more.
Tightening rhythmic playing: especially in genres like funk or country, where rhythm guitar plays a crucial role, compressors can make strummed parts sound punchier and more consistent. Compressors can also tighten high-gain tones.
Making solos stand out: compressors can help solos cut through a mix by ensuring that each note has a consistent volume while simultaneously adding sustain. This is especially useful when playing fast runs.
Common controls on a compressor pedal
Here are some of the most common controls you'll find on compressor pedals:
Threshold: determines the level at which the compression will start to kick in. When the input signal is louder than the set threshold level, the compressor will reduce its volume.
Ratio: controls how much compression is applied once the input signal is louder than the threshold. For example, a 4:1 ratio means that for every 4 decibels (dB) that the input signal goes over the threshold, the output will only increase by 1dB.
Compression: controls the intensity of the effect. Lower settings give you a subtle compression, while higher ones will heavily squash your signal.
Level / volume / output / make-up gain: after compression, the overall level of the signal may be reduced. The level control lets you boost the compressed signal to compensate for this reduction in volume.
Attack: controls how quickly the compressor responds once the input signal has exceeded the threshold. A faster attack time means the compression kicks in almost instantly, while a slower attack allows some of the initial transient to pass through uncompressed.
Release: controls how long it takes for the compression to stop after the input signal drops below the threshold. Short release times can make the effect less noticeable, while longer release times can add a smooth decay to the sound.
Hard / soft knee: some compressors have a 'knee' control which determines how gradually or abruptly the compression engages. A "hard knee" applies compression suddenly, while a "soft knee" results in a more gentle and gradual compression onset.
Blend: controls the blend of the uncompressed (dry) signal with the compressed (wet) signal. This can be useful for maintaining some natural dynamics while still benefiting from the effects of compression.
Compressor pedals can vary significantly in terms of complexity and control layout. Some pedals have simple controls with just two or three knobs, while others give you more comprehensive control over the compression parameters.
Pedals with fewer knobs often combine multiple parameters into single controls. For example, a single “compression” knob typically controls the threshold and ratio simultaneously.
Whenever you get a new compressor pedal, read the manual for information on what each knob specifically does and how the controls interact with each other.
Where does a compressor pedal go in the signal chain?
Compressor pedals are typically placed at the beginning of the signal chain. This lets you send a consistent signal to the other effects that follow.
If a compressor pedal is placed after modulation effects like phaser or chorus, or time-based effects like delay, the varied dynamics introduced by these effects will be compressed, potentially flattening their depth.
Similarly, placing a compressor after drive pedals like overdrive or distortion may result in an overly pronounced or muted distortion effect, depending on how the dynamics are affected.
That said, if you have a wah pedal, you should place it before the compressor to ensure that the expressive nuances of the wah effect are captured.
Of course, these are merely suggestions. Experimentation is key. Don't hesitate to try different placements in your signal chain, you may uncover some rather unique sounds.
How to dial in a compressor pedal
When dialing in your compressor pedal, start by determining its role in your setup. Different playing styles and musical contexts need varying approaches to compression.
If you’re aiming to even out your sound for rhythm guitar parts, you'll want to set a moderate threshold with a higher ratio. This ensures that your playing stays at a consistent level without the occasional loud chord jumping out.
As a lead guitarist, you might be looking for that extra sustain on your solos without altering your tone too much. In that case, opt for a lower threshold to allow the compressor to kick in more frequently and a lower ratio to preserve the expressive qualities of your playing.
When tapping or playing fast solos, a higher threshold with a lower ratio can be the key to ensuring your notes come through clearly without blending together and losing definition. This will keep your passages articulate.
When recording and doubling guitar parts or layering harmonies, a subtle compression with a lower ratio and a threshold that just catches the peaks can help to "glue" the parts together. This gives you a cohesive sound without squashing the dynamics.
For fingerstyle players, compression can help bring out the softer notes. You'll want to adjust the threshold lower so that it catches the quieter nuances of your playing. Set the ratio to a moderate level to ensure the soft notes are heard alongside the louder ones.
When playing slide guitar, a medium threshold with a higher ratio helps in maintaining the smoothness of the slides, allowing notes to transition seamlessly without any significant volume differences.
It’s all about finding that sweet spot where the compressor enhances your tone and performance without eliminating all the dynamics in your playing. Remember that a compressor is often felt rather than heard. Subtle tweaks can make a big difference in the feel and response of your guitar. Trust your ears and how the guitar feels in your hands when dialing in your compressor.
Guitar compressor settings
Tight rhythm playing (funk)
If you're playing in a funk band where tight, percussive rhythm parts are key, you'll want a setting that evens out your attack and keeps your sound punchy.
Threshold: set to a medium level to capture most of your playing dynamics.
Ratio: a ratio of around 4:1 should be enough to keep your rhythm tight without choking your sound.
Attack: a fast attack will ensure that the initial transients of your funky strumming don't overwhelm the mix.
Release: a quick release will let the compressor reset quickly between notes.
Level: adjust so that the output matches your bypassed signal or gives just a slight boost to cut through the mix.
Try the “4th Position Compressor” in Archetype: Cory Wong for seriously tight funky rhythm tones.
Controlling high-gain tones
If you want to maintain aggression without muddiness in high-gain tones, a compressor can help tighten the sound.
Threshold: set high to only tame the loudest peaks.
Ratio: a ratio of 6:1 or higher will keep the peaks in check.
Attack: fast attack to immediately control the peaks.
Release: quick release to avoid affecting the sustain of your notes.
Level: set to match the volume of your bypassed high-gain signal.
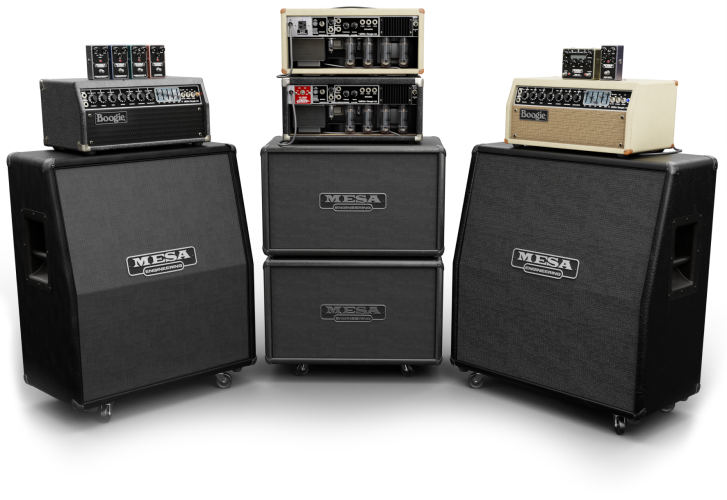
The compressor in the Mesa Boogie Mark IIC+ Suite will keep your high-gain tones tight and beefy.
Smooth leads
For solos, especially in blues or rock, where you want to emphasize feel and sustain without losing expression, subtle compression is key.
Threshold: set slightly lower so it catches all the nuances in your playing.
Ratio: a lower ratio, like 2:1, will add sustain while keeping your playing expressive.
Attack: a slower attack allows the initial pick attack to come through, maintaining the bite in your notes.
Release: a medium release will sustain notes smoothly without unnatural pumping.
Level: increase slightly above unity to help your solos stand out.
For beautifully smooth and expressive lead tones, try the compressor in Archetype: Petrucci.
Acoustic guitar
When playing acoustic guitar, particularly in a solo or duo setting, you may want the natural dynamics to shine while still ensuring that softer notes are heard.
Threshold: set to a lower value to catch the soft nuances of your playing.
Ratio: a moderate ratio of 3:1 is a good starting point. You want to bring up the quieter parts without squashing the dynamics.
Attack: a medium attack will preserve the natural pluck of the strings.
Release: go for a medium to long release to avoid any abrupt changes in volume and maintain a natural-sounding decay.
Level: adjust to match your bypassed signal or to compensate for any volume loss due to compression.
The Acoustic amp in Archetype: Tim Henson paired with the compressor pedal will let the rich harmonics of your acoustic instruments shine.
Next steps
Now that you’ve learned about how compressors can support various aspects of your playing, it’s time to put theory into practice. Neural DSP guitar plugins feature a vast collection of diverse compressor pedals for you to try. All of our plugins come with a fully featured 14-day free trial, so you can experiment with different types of compressors risk-free.
Remember, compressors are less about altering your sound and more about refining it. The subtle nature of compression means that its most important contributions to your tone are more about enhancing feel and response rather than dramatically changing it.
When dialing in a compressor, always trust your instincts. The right setting is the one that works for your unique sound and playing style. So, make sure you experiment with different pedals and settings.
To broaden your understanding of guitar effects, make sure you read our articles on how to use distortion, overdrive, and delay pedals.
For an extensive look at guitar effects in general, browse through our catalog featuring over 70 high-quality guitar effects across our diverse range of guitar plugins.
If you're a beginner in the world of guitar plugins, our getting started guides will help you at every step.
Guides for getting started with plugins
All our plugins have a 14-day free trial
Download a free trial of any of our guitar or bass plugins and take your tone to the next level.